Introduction
This Toshiba Satellite L500-13W was abandoned with Windows 7 and a failing Kali Linux install. Overheating, keyboard misconfiguration, and disk errors made it unsuitable for learning. By stabilising the hardware and installing MX Linux, I turned it into a reliable, quiet lab device — ideal for practising structured SOC methodology and preparing for AWS Cloud SOC labs.
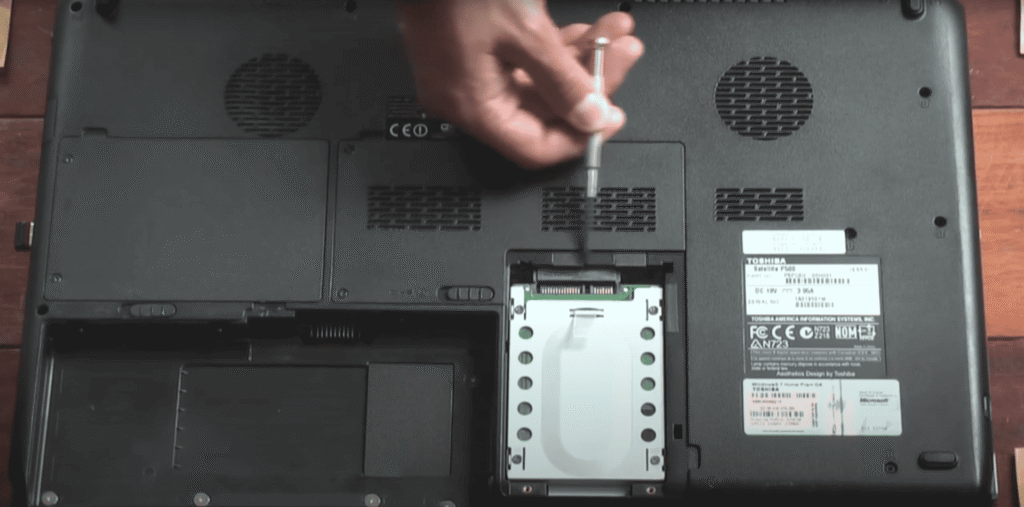
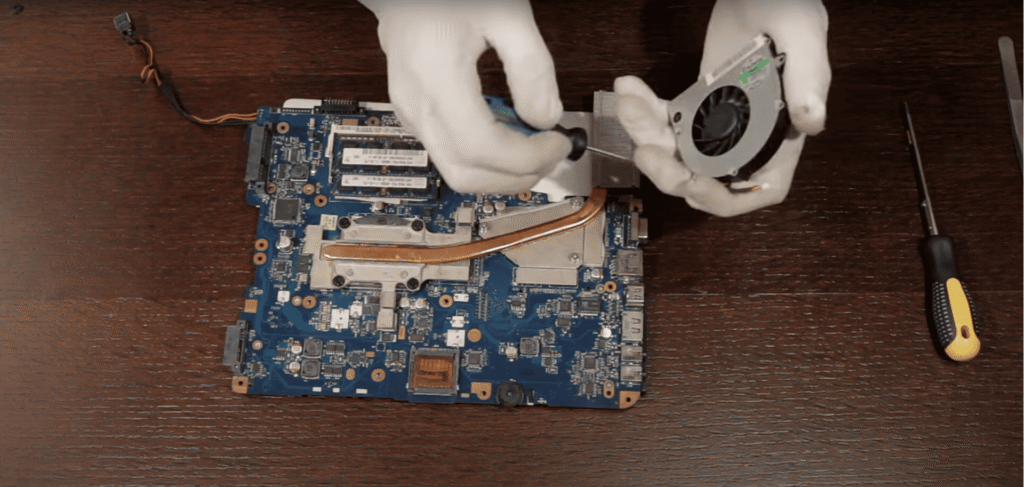
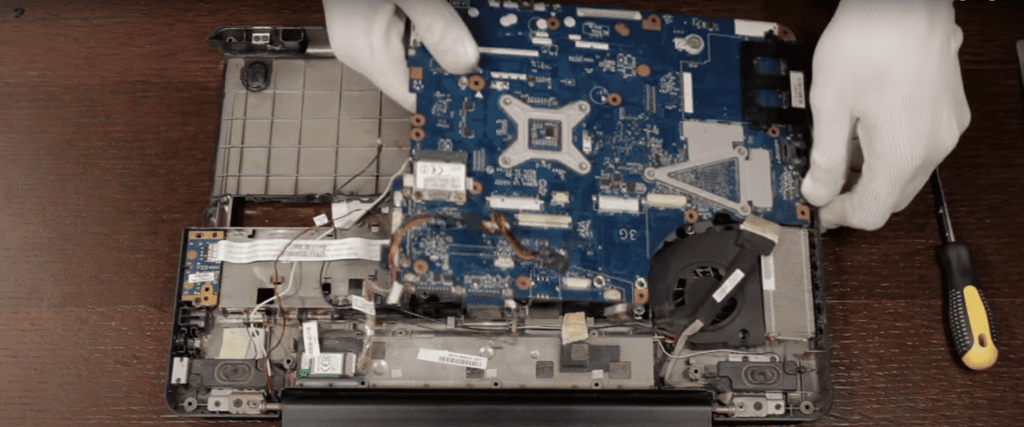
Hardware Stabilisation & OS Choice
Key upgrades included cleaning the fan, reapplying thermal paste, and replacing the HDD with a 240 GB SSD. MX Linux 23 was selected for stability on legacy hardware, low memory usage, and compatibility with security tooling. These decisions ensured reproducibility — a critical habit in both SOC investigations and cloud monitoring.

Tooling & Hands-On Workflow
Installed tooling reflects real-world SOC workflows and is directly transferable to cloud lab practice:
- Network & system analysis: nmap, wireshark, lynis
- Vulnerability & host security: openvas, fail2ban, ufw
- Automation & development: Python, Git, VS Code, Geany
Lab tasks included structured alert triage, scanning, packet inspection, and log analysis — all of which are methodologies directly applicable to AWS CloudTrail and GuardDuty investigations.
Lessons for Cloud SOC Progression
This lab reinforced habits critical for professional environments: assessing constraints, stabilising systems, validating assumptions, and documenting reproducible workflows.
I also understood that for my next laptop, to run multiple VMs for AWS SOC labs, I need:
- CPU: Intel Core i5 or i7 for sufficient processing power
- RAM: 32 GB minimum to comfortably host several virtual machines simultaneously
- Storage: 500 GB SSD or larger (preferably NVMe) to handle VM disk images, OS installations, and snapshots efficiently — ideally 1 TB for multiple labs and future growth
These specifications will ensure smooth, stable, and scalable lab environments, allowing me to progress from IAM → Detection → Identity-Centric labs without hardware bottlenecks.
Next Steps
- Publishing repeatable SOC and AWS lab environments for lightweight hardware
- Building automation scripts for log collection and alert simulation
- Documenting lessons for portfolio, blog, and GitHub to demonstrate practical, cloud-ready SOC skills
Links
- GitHub Repo: toshiba-legacy-linux-hardening-lab
- Portfolio Entry: Legacy Laptop Recovery & Linux Hardening
- LinkedIn Post: From Obsolete Laptop to Hardened Linux System (Hands-On Recovery Lab)